

Undead Burg is one of the most interesting levels in Dark Souls. It serves as a ‘tutorial level’ while also having some of the tightest cohesion between level design, environment art, and storytelling in the game. Let’s talk about that.
So, I guess it’s important to start with Firelink Shrine. Because, if you talk with the crestfallen knight, he gives you a lot of useful information about where to start.
It’s funny, because a lot of people don’t even take NPC dialogue that seriously in Dark Souls. Even if they talk to them! It might be that since the narrative is so out-of-the-way, it leads people to believe that there isn’t a narrative at all.
You have to work to understand the plot (which might be a negative for some, which is totally fine), and that includes listening intently to what characters have to say. It’s a good method for the game to tell us (in uncertain terms) where to go.
Thankfully, the crestfallen knight tells us where to go in very certain terms.
He says that one of the Bells of Awakening (a place you need to reach to progress) is up in the Undead Church, but the lift is broken. So, we have to get there by entering the waterway up the staircase.
At the stair, we meet our first enemies, if you don’t count the Undead Asylum. At the top of the stair, there’s an undead guy throwing firebombs at us. Those hurt a lot, especially if you’re a weakling like the sorcerer.
At the bottom, are a group of undead guys wielding swords. They rush at us.
This situation is something that comes up a lot in Dark Souls, and in action games in general. Having to fend off a group of enemies while running around trying to avoid whatever that guy up there is chucking at you.
For people who have played the game a lot, this stuff is mad easy. I actually feel a little stupid even writing this. But for players who are having their first experience with the game, they might get dropped a couple of times trying to run up and whack everything oonga boonga style.
Dying to those peasants is a humbling moment. It’s a way for the designers to let you know that no matter how shitty the enemy you’re fighting is, if they’re in a group (with a guy chucking whatever it is he’s chucking at you), you might want to use that noggin up there a bit more.
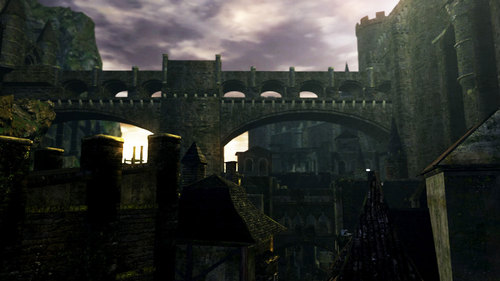
Once the undead guys get taken out and before we enter the waterway, we might notice that it leads into a gigantic curtain wall half a mile high.
When we enter the waterway, there’s a probably a 50/50 chance that we look to the right versus the left. If we go right, we continue down the waterway, up another staircase, into Undead Burg: the town behind the curtain wall.
But if we turn right, we also get poisoned (possibly to death).
That’s because to our left, then subsequently to our behind (if you’re following me, I know this shit makes almost no sense in written form, but the spatiality isn’t the most important thing here, I promise), there’s a bloody, giant, plague infested rat!
This is another thing that the game does a lot: enemies lurking just outside of our field of vision around a corner, ready to mess us up. Its message is loud and clear: if you don’t check your corners, we will mess you up.
It’s messed up too. The poisoning you get if the rat bites you will definitely kill you if you don’t have enough Estus (the healing item).
For a first lesson in corner checking, getting lethally injected with rat poison seems a bit harsh, but it’s on purpose. From now on, anyone that got bit by that rat will have a very real fear of doorways for a very long time.
If you turned left, you might still have gotten poisoned, but at least you killed the rat! And you get an item, a humanity (which is a pretty rare resource that can give you more healing items, among other things). In a way, turning left has the opposite effect!
Okay. Going down the waterway and up the stairs, we reach the rooftops of Undead Burg. We’re also welcomed with four undead guys. The first two rush at us, much like the situation at the stairs. Assuming we drop those fools, we push forward.
The third guy’s a little further back, nestled cozily between two buildings (buildings with doors).
I’m willing to bet that a lot of people engaged in a duel of honor with that undead guy, mano a mano, before getting jumped from the shadows by the fourth undead guy, who was hiding behind the doorway!
This is the second time within two minutes (tops) that the game does the doorway trick to us.
This is lesson number two in corner checking. The game is telling us loud and clear that there will definitely be enemies when you don’t expect it, even if you expect it. Even if you’re in a battle with an enemy, creatures lurk in the shadows.
For the big brained left-turners, this might serve as a first experience into door lurkers. Although, those that turned right, who were scarred from before and very cautious, probably still got got by that guy. No one is ready for that to happen when they’re already using max brain power duking it out with someone else.
Moving on, going in the building to the right is the way forward. We’ll call that the critical path. To the left is another building.
Inside is a stone staircase that’s crumbled at the bottom; we can’t go upstairs. But we’ll be able to go there again later, I promise.
Outside, next to the pair of buildings, is a dead body with a big, shining soul hovering on it. This is the game’s way of signifying that that body contains an item to collect. And you can see them from very far away.
But it’s on a balcony that we can’t access. . . or can we? Just above it is a pile of crates and barrels. We can break those! Actually, a lot of the wooden furniture on this level is breakable.
The cool thing is, a good amount of people probably ended up breaking those crates during the battle with the four undead guys, since it’s in the same area.
When we drop on the balcony, we can pick up the item. In this case, what we get is what it looks like: a soul (an item you can consume for currency. . . called souls). In other cases, it’s more interesting things.
More importantly though, a ‘secret’ area was brough to our attention with a shining item. It’s a good way of grabbing people’s attention to areas outside the critical path. However, it’s also useful to let players know that you can even get there in the first place.
This is probably the most frequently occurring trick that’s used in Dark Souls. Guiding players to interesting areas with items. Like a carrot on a stick, a very bright carrot, on a very long stick. We want to see what the item is, but we also want to see what else is over there.
In the case of the balcony, there’s a crack in the guard rail that leads to another rooftop platform that winds its way through a building. We drop down.
And five or six dudes jump out of nowhere and just start wailing on us. It’s not out of nowhere though. They were hanging off the guard rail on the side of the platform. If we were paying attention, we would have had the short opportunity to take a swing at their bony fingers and send them plunging to their deaths, Lion King style.
This is the third time the game has pulled this trick on us, and it hasn’t even been four (tops) minutes since the first time! If the message isn’t clear yet, they won’t stop. New and innovative ways will be made to scare the shit out of you again
We go through the connecting building to the right; it leads to another rooftop. There’s a dead body with an item waiting in plain view.
For those of us who grabbed the item, well, it’s time to get wailed on again. I’m sorry.
For those of us who grew more spatially aware after multiple attempts on our lives (and multiple successes, no doubt), you probably noticed the item before you went through the building and to that rooftop.
Because, again, items can be seen from very far away. If you noticed the item, you would also see four ragged freaks hanging off the guard rail on the side of the adjacent building.
This is an instance that contains two examples of frequently used design tricks. For one, the game uses items as bait. You’ll occasionally see a dead body with an item in plain view, only to get jumped once your brain power is invested in discovering what that item is.
When you pick up an item, you’re presented with a fancy icon, and the name of the item along with it. I’m willing to bet most people get taken in with their own curiosity trying to figure out what it is, even going so far as to enter the menus to read its description. And that’s when you get jumped.
Dark Souls is yelling at us to pay attention at this point. To not get taken in by that shiny item over there. Enemies are all around you. This lesson is hammered home when we discover the item is literally ‘rubbish’.
Realizing you fought tooth and nail with four dreglings just for a piece of literal trash sucks. Why though? Why do all of that just to fuck with us?
Well, in terms of the narrative of the level, I think it’s supposed to get us to understand this place is no where near safe. It’s infested with Hollows (people who lost their minds). They set up kill boxes and traps, waiting for unsuspecting travelers to come through.
Lore wise, they probably want to steal humanity from people (that’s a way for people to reverse hollowing and become human again). These goons are desperate, and hungry. Honor means nothing to these freaks. So, they lurk in the shadows.
That item was rubbish because those Hollows probably used it as bait to try and kill people. Why else would they be hanging off the ledge like that?
I think it’s a good first level too. It gets us to pay more attention to our surroundings with items and traps. Later in the game, this skill comes in handy to find hidden paths and treasures.
The second example is one that we just saw, using items to see things we wouldn’t normally see. The path forward is just enough to the right of our screens that the enemies hanging on the ledge are camouflaged, but the item is bright enough to grab our attention. When we turn our screens, the freaks come into view.
Items aren’t just used to get us to look at hidden areas, but hidden enemies too. So, it’s not totally unfair.
Moving forward. This balcony we dropped down from leads to what we’ll call Loop One. This is a path that diverges from the critical path, but ‘loops’ back around to it somewhere before in the level.
This is something that happens for pretty much every level in the game. They get more and more elaborate in their design and complexity, but this one is fairly simple.
We see a ladder red with rust that leads to the top of a small curtain wall, and we climb up it. We jump down to the adjacent building, and we’re back towards the critical path, where we fought the four dudes. But not before we pick up another humanity that was sitting up there.
The ladder being red with rust isn’t just a needless description, it’s actually fairly important. This might be a reach, but most times there’s a ladder in Undead Burg, it’s contrasted with a cream-colored wall. Even when the wall isn’t cream, those red ladders stick out (like a sore thumb). I don’t think anything else in the level is red.
It means when a ladder is on the screen, it grabs our attention, much like dead bodies with shiny items.
In the current case, we had a chance to spot Loop One by turning around and seeing that uniquely red colored ladder standing against cream-colored brick. It’s hard to miss. And more importantly, it calls our attention to the floor (that we might be able to get to) that it’s standing on.
I feel like I’m repeating myself, but this is another method that the designers seem to use to yell, “You can go over here!”, at us. At least during the beginning levels.
Later in the game, red rust covered ladders become painted with dark colors. Or even worse, embedded into the walls themselves. At those end game points, the training wheels come off, and we really have to open our eyes.
Because that’s what Undead Burg is. A first level that trains us by loudly presenting its mechanics to us. During end game, those signals become suspiciously quiet, and the real Dark Souls begins.
I guess that’s where the memes come from.
So, we’re back on the critical path, and we enter the building to the right. On the second floor of that building, there’s a small wooden bridge that leads to the second floor of the other building: the one with the crumbled stone stair case that prevents us from reaching said second floor.
The bridge is broken though, and there’s a huge gap between the two buildings. However, it looks just wide enough to be able to jump across.
But you can’t. It’s too far, just barely. And I know for a fact that a lot of players probably tried jumping that gap at least ten times. It looks like you should be able to make it! Plus, there’s no real punishment for trying over and over again. It’s not like you fall to your death; the drop is only three or four feet.
It’s a bitter feeling, not being able to make a jump that looks doable. And it’s a feeling that stays in your mind. That feeling is compounded for people that gave it a go, or ten.
And that’s a clever trick, but we’ll come back to that later.
If we continue down the critical path through the building, we go up some steps and reach a bridge. As we cross, a massive, fifteen-ton, firedrake (or wyvern, or dragon, I don’t stan dragon lore so I’m gonna need some help) comes down for a hot minute, then peaces out immediately after. It’s pretty spooky, but it’s more of a teaser for later.
Collecting ourselves, we proceed to the next rooftop. It’s a situation we’ve seen before. A kill box where we duke it out with three hollows while a fourth one chucks arrows at us from an elevated tower.
You can either dance around, managing the enemies in front of you while getting out of the way for projectiles. Or, you can rush the dude at the top, since ranged enemies in this game generally don’t run away or have a melee weapon to use, they’re just a dumb idiot waiting to get dropped.
Again, this combination is frequently used from the beginning of Dark Souls, all the way to end game. However, the former strategy becomes more prevalent when ranged enemies start to sit in hard to reach areas.
In some ways, it’s another case of training wheels mode, since the former strategy is a bit harder. But I might be reaching.
After that, we can go through the critical path, up the stairs. Or we can go to another rooftop courtyard to the right, where there are two shield and spear wielding hollows.
This is the first kind of enemy we encounter that isn’t a broken sword wielding or crossbow shooting hollow. These goons don’t mindless run at you, they stay on the defensive, where they can poke you from the safety of their shield.
Players need to approach those guys with a different strategy. Whether that be by strafing around them or kicking their shield away is up to them. The point is, the enemies are like chess pieces. With each piece requiring an ever so slightly different strategy. Interesting things happen when the pieces are mixed together. More pieces are added to the roster as the game progresses.
More importantly though, is a group of boxes strewn around to the left. Of course, we can break those (and of course, we could have broken them in our battle just now). If we do, it leads to a stair case down into the building. . .
This leads to Loop Two. I’ll spare the details, save for a couple points, since we’ve seen a lot of this stuff already: enemies hiding behind furniture (that’s new!), hallways, groups of hollows. You get the idea.
Firstly, there’s two exits on the floor by the staircase. One of them leads to a balcony with the game’s first merchant: an undead guy. This is a good opportunity for players with extra souls to spend to buy something that looks cool.
The most important item, though, is a key. It’s called the Residence Key, and its description says that it can open various doors in Undead Burg.
Promises of locked doors (probably with secrets), that we haven’t even seen yet, unlock desires in us we didn’t know we had. So, we buy the key.
The other exit, which is a continuation of Loop Two, leads to a terrace. At the end of this terrace is four dreglings whom we duke it out with, but also a ladder, red with rust.
Once again, players who turned around on the bridge would’ve seen a red ladder contrasted against a cream-bricked wall. Which would have alerted them to the existence of another divergent path. For those who discovered the path by breaking the boxes however, it was probably way more interesting.
If we climb the ladder, we end up on the roof of a building, with a dead body with an item near the far edge.
It doesn’t really matter what the item is, because what it does is lure us to the ledge. If we go over there, we’ll notice a familiar sight; a former adversary. The broken wooden bridge from earlier.
But the tables have turned. We’ve got the height advantage now; we’re on top of the building that we came through before.
This is a big brain level trick: presenting us with something that looks doable, having us discover it’s impossible through many attempts, attempts made only because it looked doable, having that bitter event burned to our memories, then presenting us with the tools to do it correctly later.
If we make the jump and make it to the second floor, we’re rewarded with a crossbow! Okay, it’s not that great of a weapon, but new players don’t know that! It looks cool!
In all honesty, it’s a bit of a shame that the item isn’t something a bit more valuable. It doesn’t take a lot of work to get there, but it feels like a lot of work, and that means something.
Moving on, this is also where Loop Two circles back around to the critical path. Through the building and over the bridge the firedrake was chilling out on.
Back in the courtyard where the kill box was (y’know, three dudes + one chucking shit at you) up the stairs is the continuation of the critical path. To the left, in a big square tower that supports an even bigger shadow-casting bridge that looms up above, is a bonfire.
There’s also a staircase that leads to an upper level of the tower, but it’s crumbled, much like the stairs from earlier. However, there’s also a ladder at the top that’s just out of reach. We’ll come back to this in a bit.
This is the first bonfire that players reach after Firelink Shrine. It’s not that far from home base, sure. For new players though, it’s a bit more of a journey, especially for those that died a couple times. Doubly especially so for those that fought tooth and nail to get their souls back every time they died.
The Undead Burg bonfire signifies the end of a ‘story segment’. Nothing happened in the narrative (unless you count learning about the lore), but the level design itself tells a story.
Players traverse through the waterway, emerge on the Undead Burg’s rooftop courtyards, contend with hollowed soldiers, discover paths to lower terraces hidden by debris, find secret items, jump off a rooftop to a secluded second story window, and fight their way up the steps to end the story segment at the bonfire in the bridge tower.
The bonfire is a moment of quiet and relief at the end of each story segment. A chance to level up with the souls you collected, kindle the fire with humanity you pillaged, and do whatever else that needs to be done.
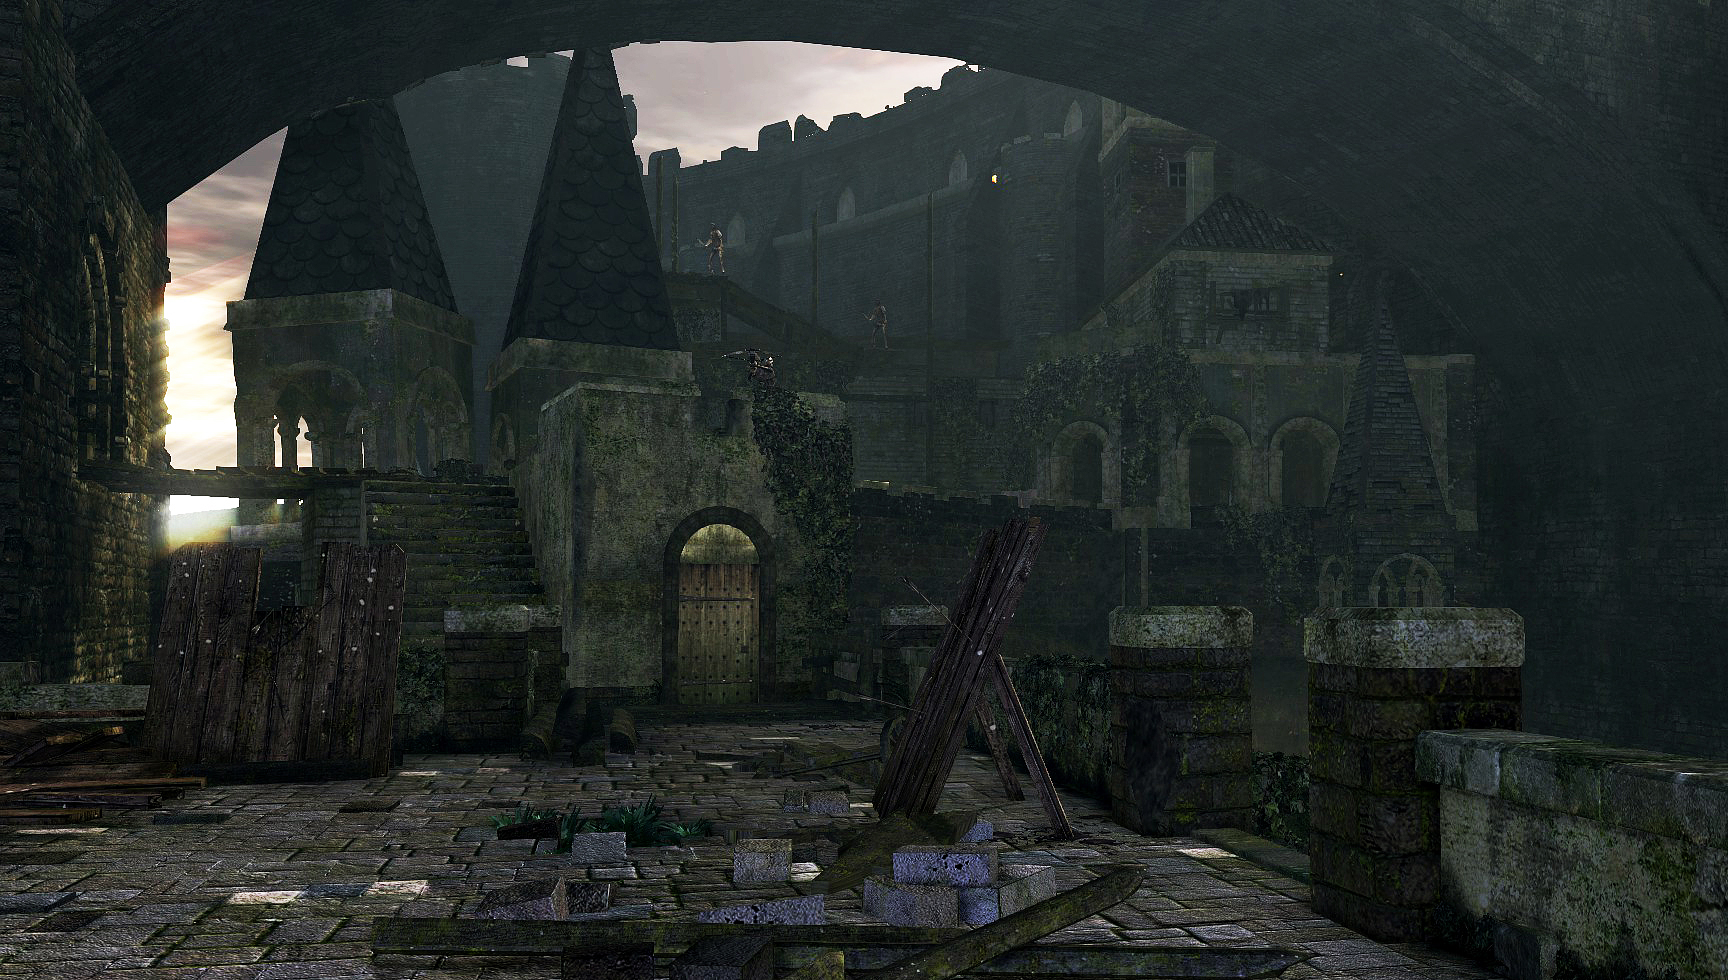
Every area in the game has their own unique story. In Undead Burg’s case, players have to pass through a chaotic town center with buildings, houses, bridges, and hallways crisscrossing paths in a haphazard layout. With enemies lying in wait with traps, bait, and crossbows in every corner.
If you’ve never played Dark Souls and you think Undead Burg sounds cool, just wait till you see some of the other areas in the game (but, I’m not gonna spoil it)!
Aside from the level design, the environment art plays a huge role in telling that story too.
Inside houses, there’s so many pieces of furniture and china lying around (that you can break!). You’re never really sure if there’s a hollow hiding behind a knocked over cabinet or something. Plus, it makes those rooms look so lived in!
Outside, the courtyards are strewn with rickety wooden bridges, crates, moss, misplaced bricks, and vines. The buildings themselves are so varied and intricate that they look like they were built by people (and I guess they were if you count the 3D modelers).
All of those clustered-up buildings and stuff thrown everywhere makes it really hard to tell which direction is forward and what platform is safe to drop down towards. There’s no map, so you could even get lost if you lose your bearings.
The ‘story’ of Undead Burg takes us further up the town, encountering trials and secrets that we’ve seen before, but presented in new and interesting ways.
For example, after the tower bonfire, we fight our way across a bridge while dodging firebombs being thrown at us from an unreachable (at the time) platform above. Another instance of a kill box scenario.
Inside that building, after clearing the room full of hollows, we encounter an unopenable door with a display message saying, “Cannot be opened from this side”.
In the adjacent building, we can peer through a window and observe a staircase coming from somewhere below, leading up to the previously mentioned unopenable door. Another instance of showing us somewhere can’t get to yet, but will (probably) be able to get to later.
The Black Knight (a powerful late game enemy) guarding the item in this area is also a good example of that. However, that’s more of the case with new players, who’d probably be intimidated after getting cut down like an animal in one swing.
Skipping ahead a bit (I don’t want to spoil all the fun), players find themselves climbing a watchtower, then contending with a massive twenty-foot hulking humanoid bull called the Taurus Demon.
At this point, this is the toughest challenge that players face. It’s a dangerous battle with a powerful demon atop a skinny curtain wall, that can see you falling off, or being flung off, the edge.
Resourceful players might figure out that they can use the watchtower to do a plunging attack right on the demon’s head, dealing tons of damage. That’s a big time David vs Goliath moment.
An even bigger moment is actually beating it, and being rewarded with more souls at once than we’ve ever had so far.
Then you have to hold that shit.
You’d think that the highest point of tension in the level would be fighting Taurus Demon, but no, it keeps ramping up. Because now you have to make sure you survive until the next bonfire, with the most souls you’ve ever had.
Pushing forward, we reach a massive bridge. But the firedrake we saw earlier regularly douses the area in flames with its breath. It even gives players a taste tests the first time they get there.
Yet it’s the only way forward. As we get closer, we can see a tip top of a staircase leading down to a structure below the bridge. And we can make a break for it.
This is the absolute highest moment of tension in the ‘story’ of Undead Burg’s level. Staring down the fire breathing drake, anticipating, with heart palpitations, the wall of flames that will end it all, whilst sprinting towards the staircase to safety, is absolutely nail-biting. Most of the time, it comes down to just a second between making it and getting roasted. And trust me, that stuff’s exciting.
Inside is a room. One of the doorways leads further down, where we find ourselves in front of a ladder. We can kick it. We climb down.
There’s a bonfire, but it’s already lit! This is the same tower that we took refuge in earlier!
This is where the height of all that tension dissipates and gives way to massive relief. We once again can rest, spend our souls to level up, and take a break.
It’s a moment that’s interesting on multiple levels. In terms of the ‘story’ players had to deal with the tension of holding on to a large amount of souls after enjoying the relief of defeating a powerful demon. That tension was doubled after dealing with the firedrake, with the peak of that tension being the moment players dive to safety just before getting roasted. All before leading to a point of release once we find the bonfire.
It’s a lot similar to the ‘first half’ of Undead Burg: from the waterway all the way up to reaching the tower bonfire the first time around. Except the affect is doubled.
This point is also interesting in terms of the level geometry.
We pass under the bridge when we make our way through the town. After we climb the watchtower, we end up above the bridge. The time spent going from the waterways to the watchtower is a long time, especially for new players. By the time we get to the bridge, we probably forgot where the hell we were. We were to busy throwing hands with the big bull demon.
I’m willing to bet most people had no idea where they were during the bridge segment (I know I definitely didn’t). Not knowing makes finding the tower bonfire down there the second time around all the more exciting.
It’s points like that that make Undead Burg so interesting. A lot of the design tricks used in this level repeat themselves, but it never gets old. They’re always reused in new and interesting ways, and they increase and decrease in their effect on the ‘story’.
Undead Burg serves as a really good ‘taste test’ for what later levels present players with. Everything used here is used elsewhere, but in wildly different formats.
This level uses items and ladders to call our attention to hidden paths and enemies. Tomb of Giants does this, but in pitch black darkness!
This level uses ‘loops’ that send us off the critical path. You could argue that whole sections of the world are loops off the critical path.
Item baits, kill boxes, hidden paths covered in debris, showing us areas that we can’t get to, but will be able to later; it all starts here! (and in Undead Asylum, I guess)
Dark Souls is full of amazing levels, but Undead Burg is interesting because it both serves as a window into the rest of the game, while also having greatest link between level design, environmental art, and storytelling. And that’s really cool (it’s also my favorite level).
